Step by Step How to Configure EMS In Fault Tolerant Mode TIBCO
In highly critical applications relying on one system is not a good practice, In order to prevent the application, failure systems are often configured as fault tolerant mode so that in case of failure a smooth switchover happened without impacting customers or transactions.
In this post, I am going to explain how we can configure TIBCO EMS in fault-tolerant mode. First of all, you should know configuration files used by EMS; the most important one is tibemsd.conf which controls the behaviour of EMS. In your windows environment this file is located under EMS home but when you installed the EMS in windows EMS server loaded this configuration from below location
C:\ProgramData\TIBCO_HOME\tibco\cfgmgmt\ems\data
STEPS to configure EMS:
- Create copies of tibemsd.conf present in data folder and name it as
- tibemsd-test-EMS1.conf
- tibemsd-test-EMS2.conf
- Change the following properties in tibemsd-test-EMS1.conf
- server = EMS-SERVER-1
- listen = tcp://7222
- ft_active = tcp://7224
Where server means your EMS server name this name should be same for both EMS servers
Listen means your EMS server listener port 7222
Ft_active means your secondary EMS server port
The other values (ft_heartbeat, ft_activation, ft_reconnect_timeout) can be left at default values
-
- Change the following properties in tibemsd-test-EMS2.conf by swapping the listen and ft_active properties
- server = EMS-SERVER-1
- listen = tcp://7224
- ft_active = tcp://7222
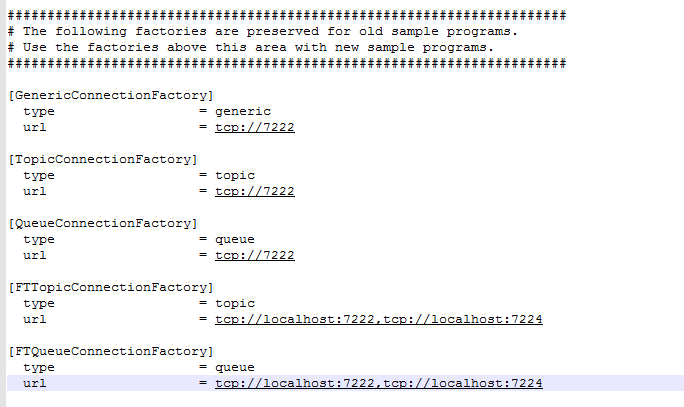
- Next is configure Factories.conf contains the information on factories available on specific EMS server. Factories are required to instantiate a JMS/EMS connection object. Add the following property in factories.conf as shown in figure
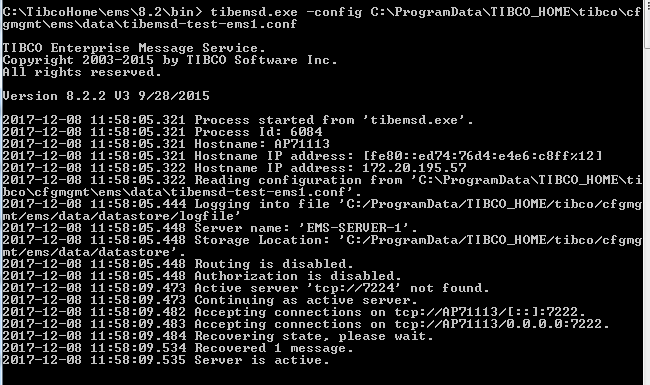
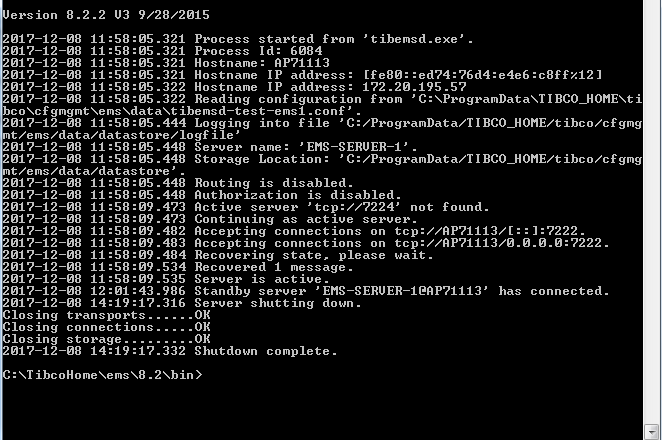
- Now open cmd and run the EMS using tibemsd.exe command for primary ems as shown in below figure
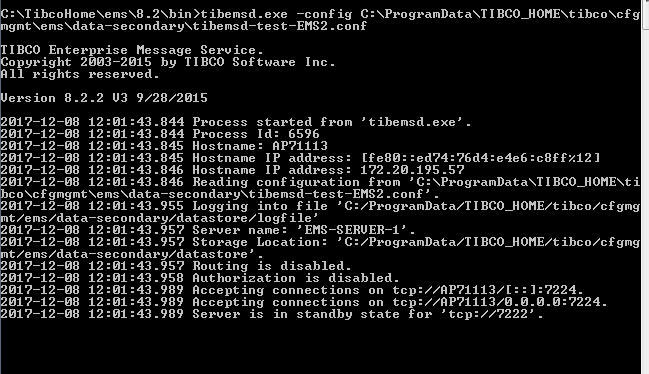
- Again run the same command with secondary ems by providing tibemsd-test-EMS2.conf file path
- Now both servers are running let’s create the BW process for testing. First, define JMS connection as shown below in figure the important part of connection configuration is JNDI connection URL with comma separated EMS URLS
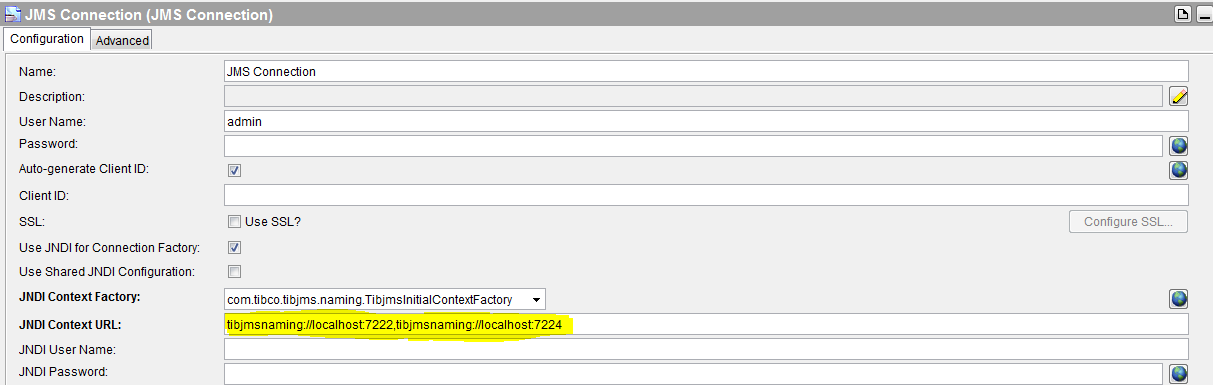
- In advance, tab change factories to FTTopicConnectionFactory and FTQueueConnectionFactory respectively.
- Create queue name sample.queue in primary server by typing Create Queue command in cmd prompt after connecting to primary ems
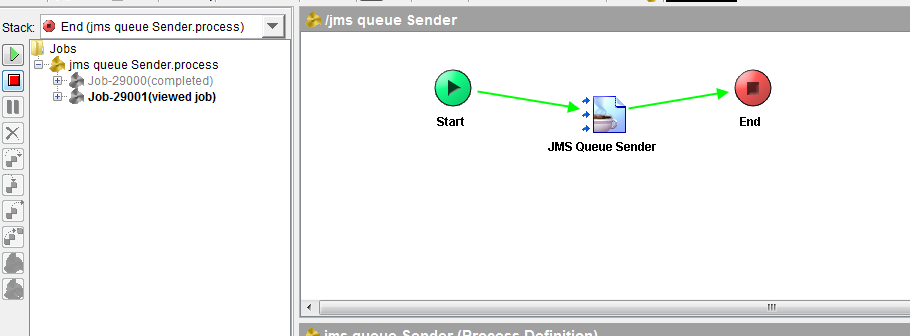
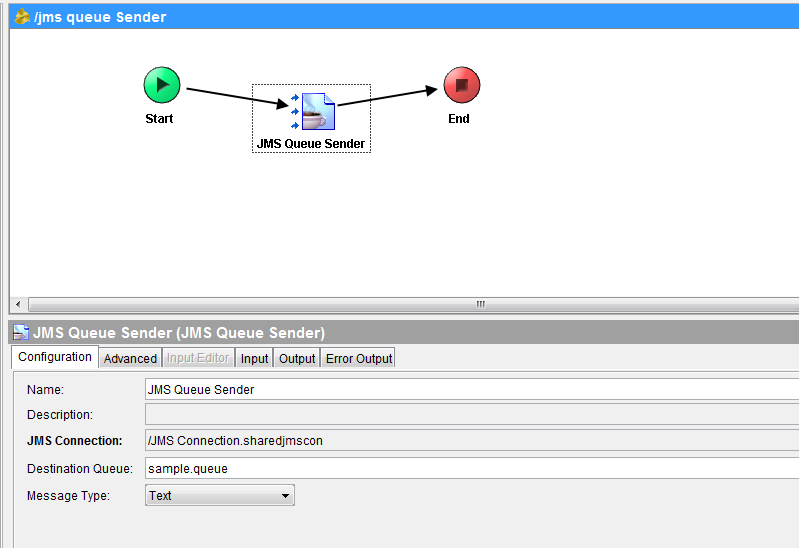
- Create a test process with send to JMS queue activity as shown on below screen
- Change the following properties in tibemsd-test-EMS2.conf by swapping the listen and ft_active properties
TEST PROCESS:
Now I am disconnecting Primary server
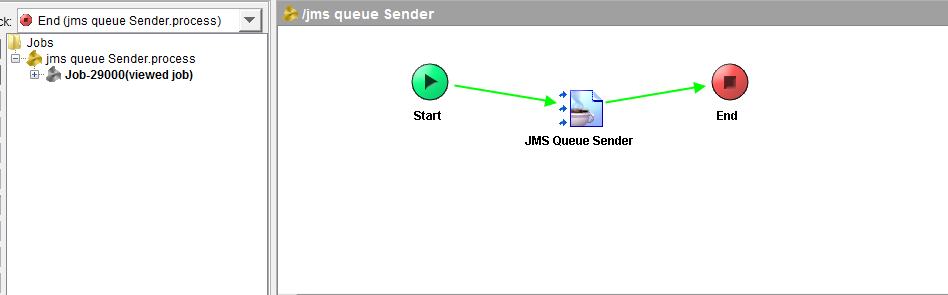
Again run the test bw process the queue sender activity successfully completed as shown below