Creating Rest Service in Tibco BW 6
In this Article I am going to explain you step by step how to create rest service in TIBCO BW 6
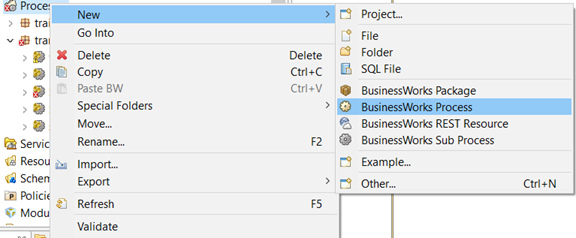
1. Create an empty workspace if not created already. Create a new Business work process by right-clicking the processes under the module
2. A new popup window appears, give the proper name of your process just like I give “SampleRestService” and press ok. A designer window appears with the process and its entire configuration.
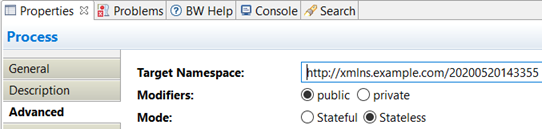
3. Now the important part for developing the rest service make sure the process mode is “Stateless” as the rest services are stateless.
4. For making the process stateless first select the process designer window you will see the properties tab appear at the bottom. Go to advance and change the mode from stateful to stateless.
5. After doing this a small icon appears on left side of your process as shown in below figure

6. By Clicking on this icon button a new popup window appears where you configure and provide which method you need to create for the rest service.
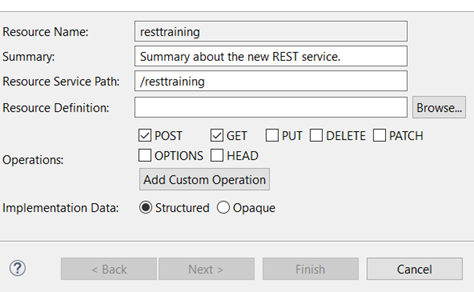
7. Give a proper resource path and selected POST and GET method and then press next. A new configuration window appears where you can configure the input and output schema for both POST and GET methods.
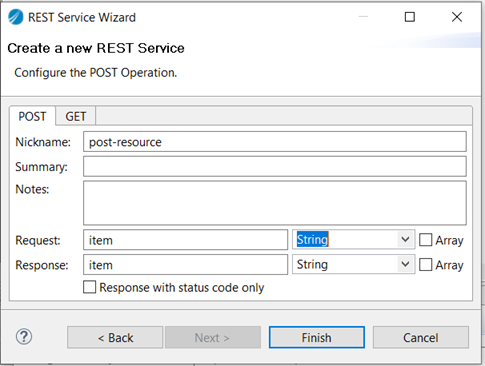
8. For POST I am creating schema that has 2 elements name and age as a Request and for response i am sending back the string e-g “output–>>success”.
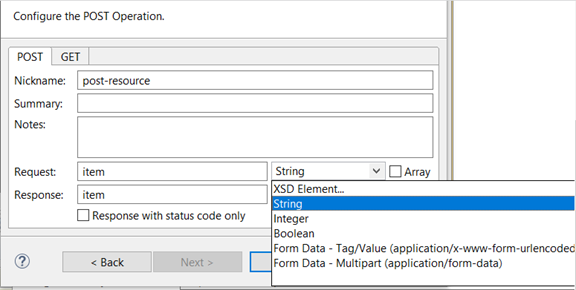
9. Now let’s Create Schema for the Request by selecting the dropdown and select the XSD Elements shown below
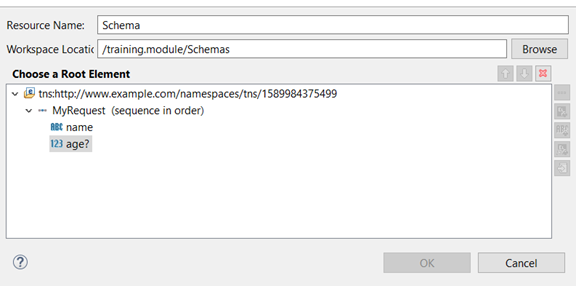
10. when you select XSD Element a new window appears for the schema you can select the existing schema or create a new schema by clicking the button to create a new schema. I name it as “Schema” and created 2 elements named “name” of type string and “age” of type integer. Please note name I make it as a mandatory element or age as a non-mandatory element. you can change these options by clicking on an individual element or you can add new elements as per your requirement.
11. Press ok and you will come back to previous Rest Service POST and GET configuration window. For GET Method I keep it as a default.
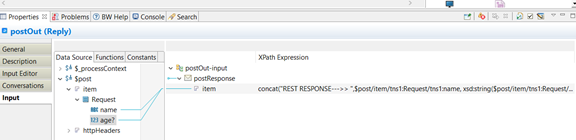
12. Click the Finish button now we have 2 methods POST and GET in your designer window. Select the PostOut activity and configure the input properties as I do as shown below with concat function
concat(“REST RESPONSE–>> “,$post/item/tns1:MyRequest/tns1:name, xsd:string($post/item/tns1:MyRequest/tns1:age))
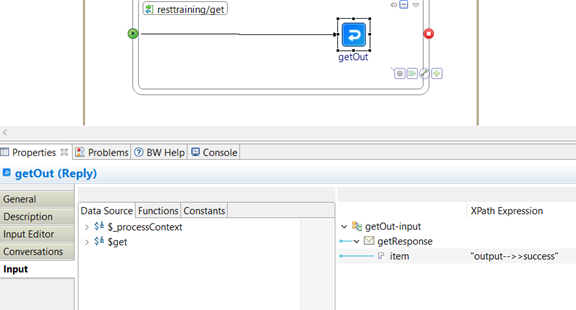
13. For GET i set string “output–>>success” in input properties of getOut
14. Now save this we have completed the basic rest service setup. In order to call the rest service, we need transport, in this case, we have HTTP so let’s define the Http connection.
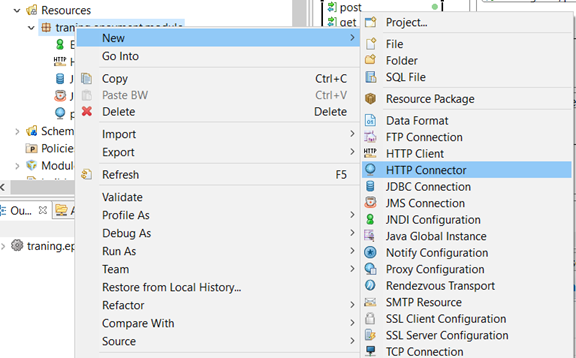
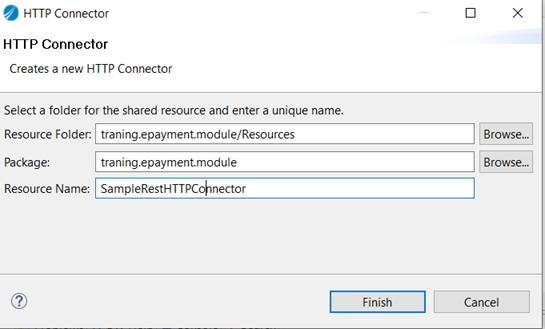
15. Go to Resource folder right click on module->New->HTTP Connector. A new configuration window appears to give proper Http connector name and click finish. By default studio created Http connection if there is not already exists.
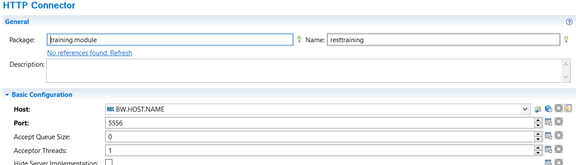
Now provide HOST and PORT make sure given port not used by any other application.
If you want to change the connection Go to the Process select the training-rest you will see the binding configuration at the bottom.
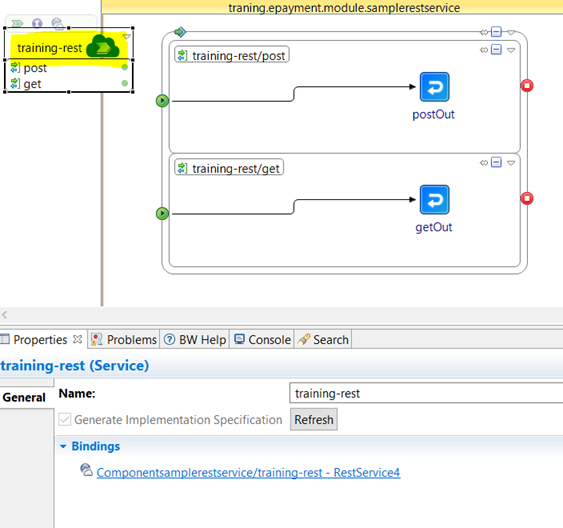
Click on binding link a new window appears to select the rest service as shown below in the picture. Select the HttpConnector name by clicking the browse button as shown below highlighted

A new window appears select the already defined Http connector and click OK
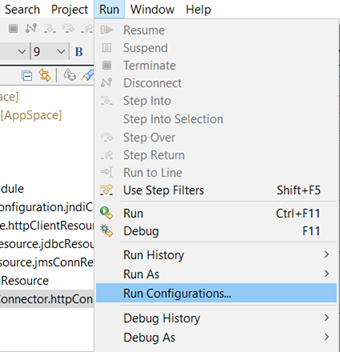
16. We have successfully created the Http transport and link that to our rest service. Now the last step is testing. for testing this process we need to run the application by selecting RUN->Run Configurations, a window appears where you select the process and click run.
Now your application is running the question is how we check that our application is successfully started for this studio provide you the console tab. just click on the console you will see the different logs and within that logs, you can find that your application successfully started.

once your application started you need to test this, there are different ways you can test your rest service you can use POSTMAN, SOAP UI, etc Studio also provide the swagger client to test your rest service for this just type “lrestdoc” in your console window you will get the discovery URL as shown below.
<>@BWEclipseAppNode> lrestdoc
[Application Name]: training
[Discovery Url]: http://DESKTOP-M9JCSLI:7777/training
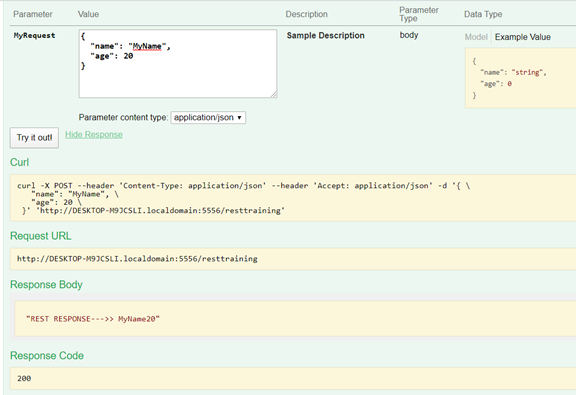
Copy this discovery url and go to any browser past it you will get swagger console as shown below

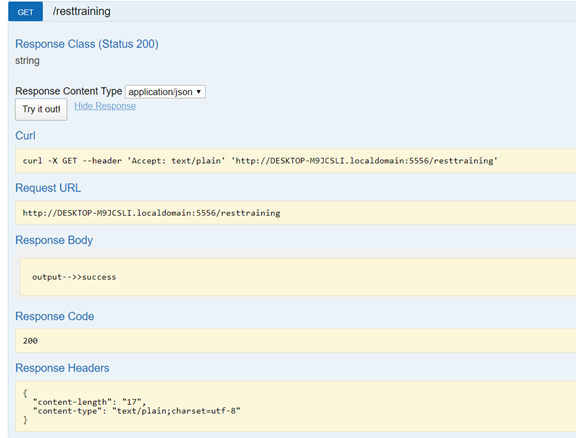
Let try the GET you will get below response
For POST: